


In this tutorial we're going to show you how you can have multiple photos or scanned images printed onto fabric using the free program photopea.com.
If you have any difficulties preparing your artwork please get in touch with us at hello@wovenmonkey.com. In most cases for a small additional charge we can prepare your photos/scan images for printing.
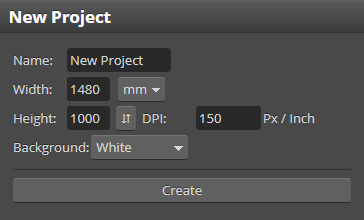
The first step in Photopea is to click on “New Project”.
You'll then need to name your project, and enter the width and length of your canvas. To enter the dimensions you'll want to change it from pixels to mm on the dropdown menu. The canvas size should match the piece of fabric you're wanting to print on. So for instance in the picture below I've entered the size of a metre of cotton drill, which is 1480mm x 1000mm. You'll also need to change the DPI from 72 to 150 DPI and keep the background white.
Now we've created the canvas we can start adding photos.
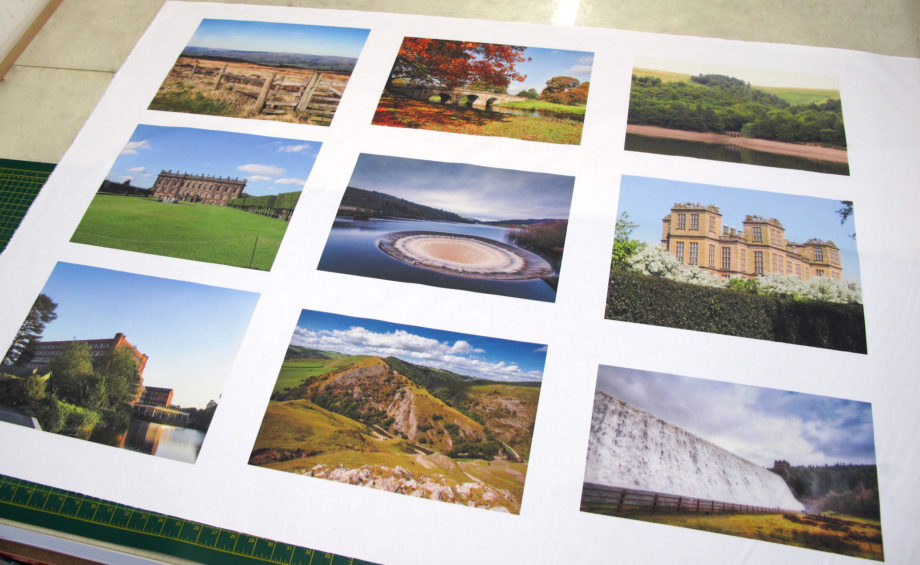
On Photopea click File > Open & Place and select the files you would like to add to your metre design. You can then click on each individual picture to position them on the canvas.

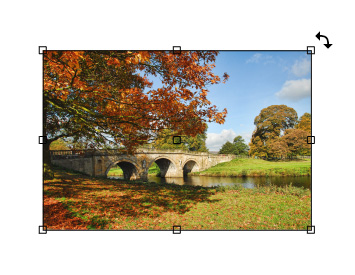
For the purposes of this tutorial it is assumed the photos are already at the size you intend them to be printed at. However, you can resize them by selecting a photo. You can then click on the corner of the picture and drag the image whilst holding down the shift key until it is at the size you want.

You can also rotate the image by clicking just off the corner of the picture as shown below.
The next step is to save your artwork. Click File>Export as>JPG>Save
The default quality setting is 70% which should be sufficient.
You're now ready to upload your file to our website wovenmonkey.com, by clicking on the create button at the top of the homepage.
Once your design is uploaded you'll then be taken to our preview page. From here you'll need to select the fabric choice and size. As you can see from the picture we've opted for 1 metre of cotton drill and selected the basic repeat.

Once you've added your fabric to the basket you then go through checkout to make your order. And that's it; all you need to do now is wait for your fabric to arrive!

Want to hear more about our great fabrics? Check out our fabric guide page. Want to chat to one of our experts? Let’s chat.